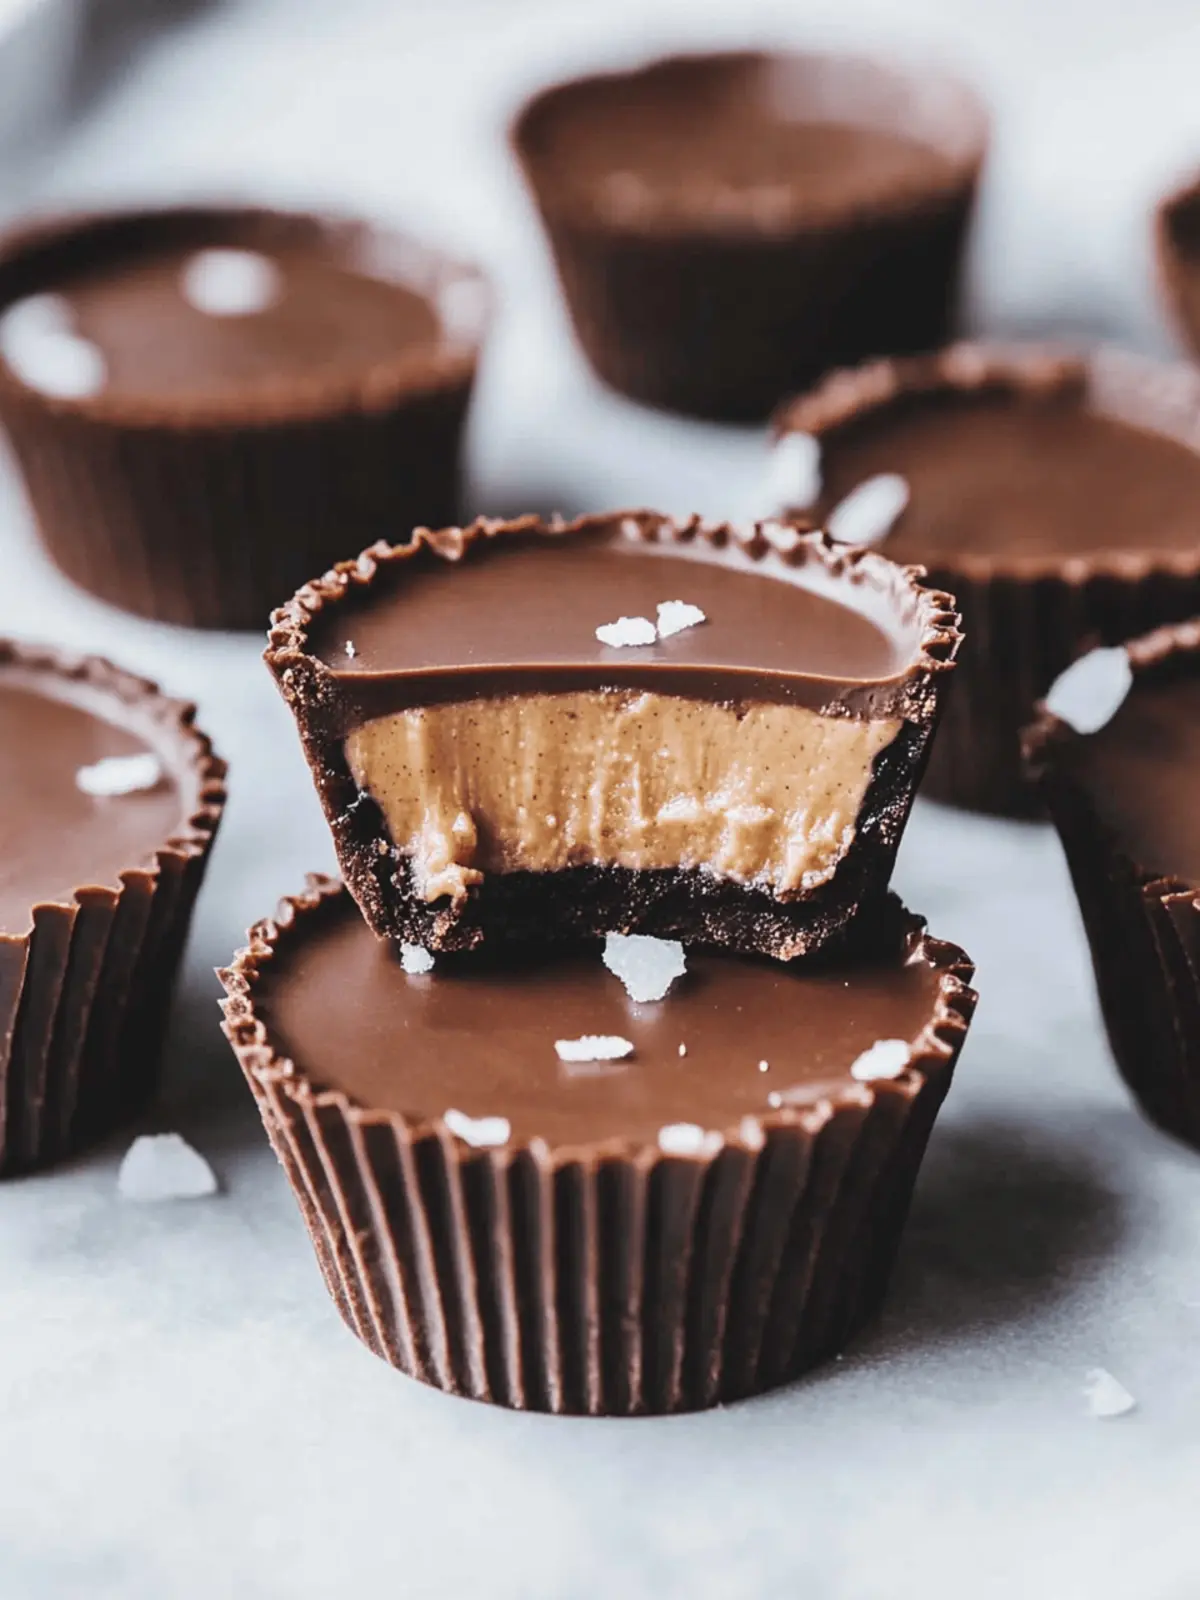
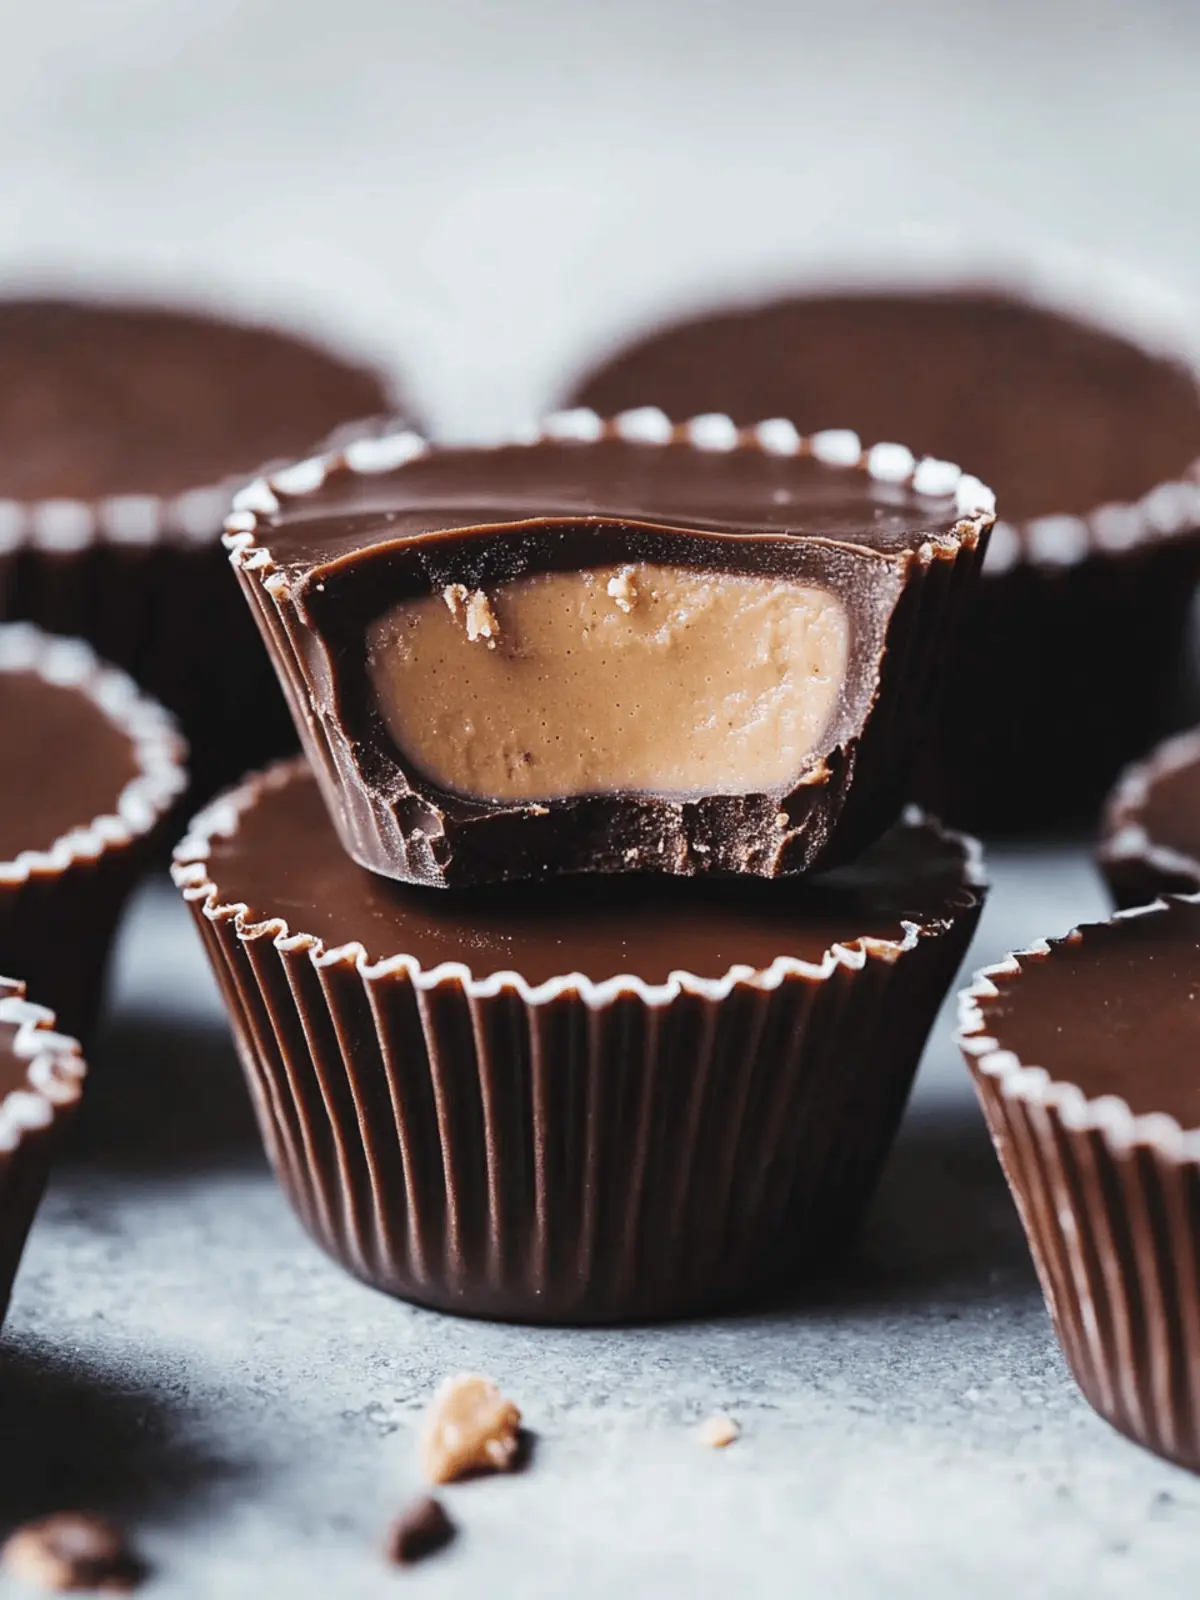
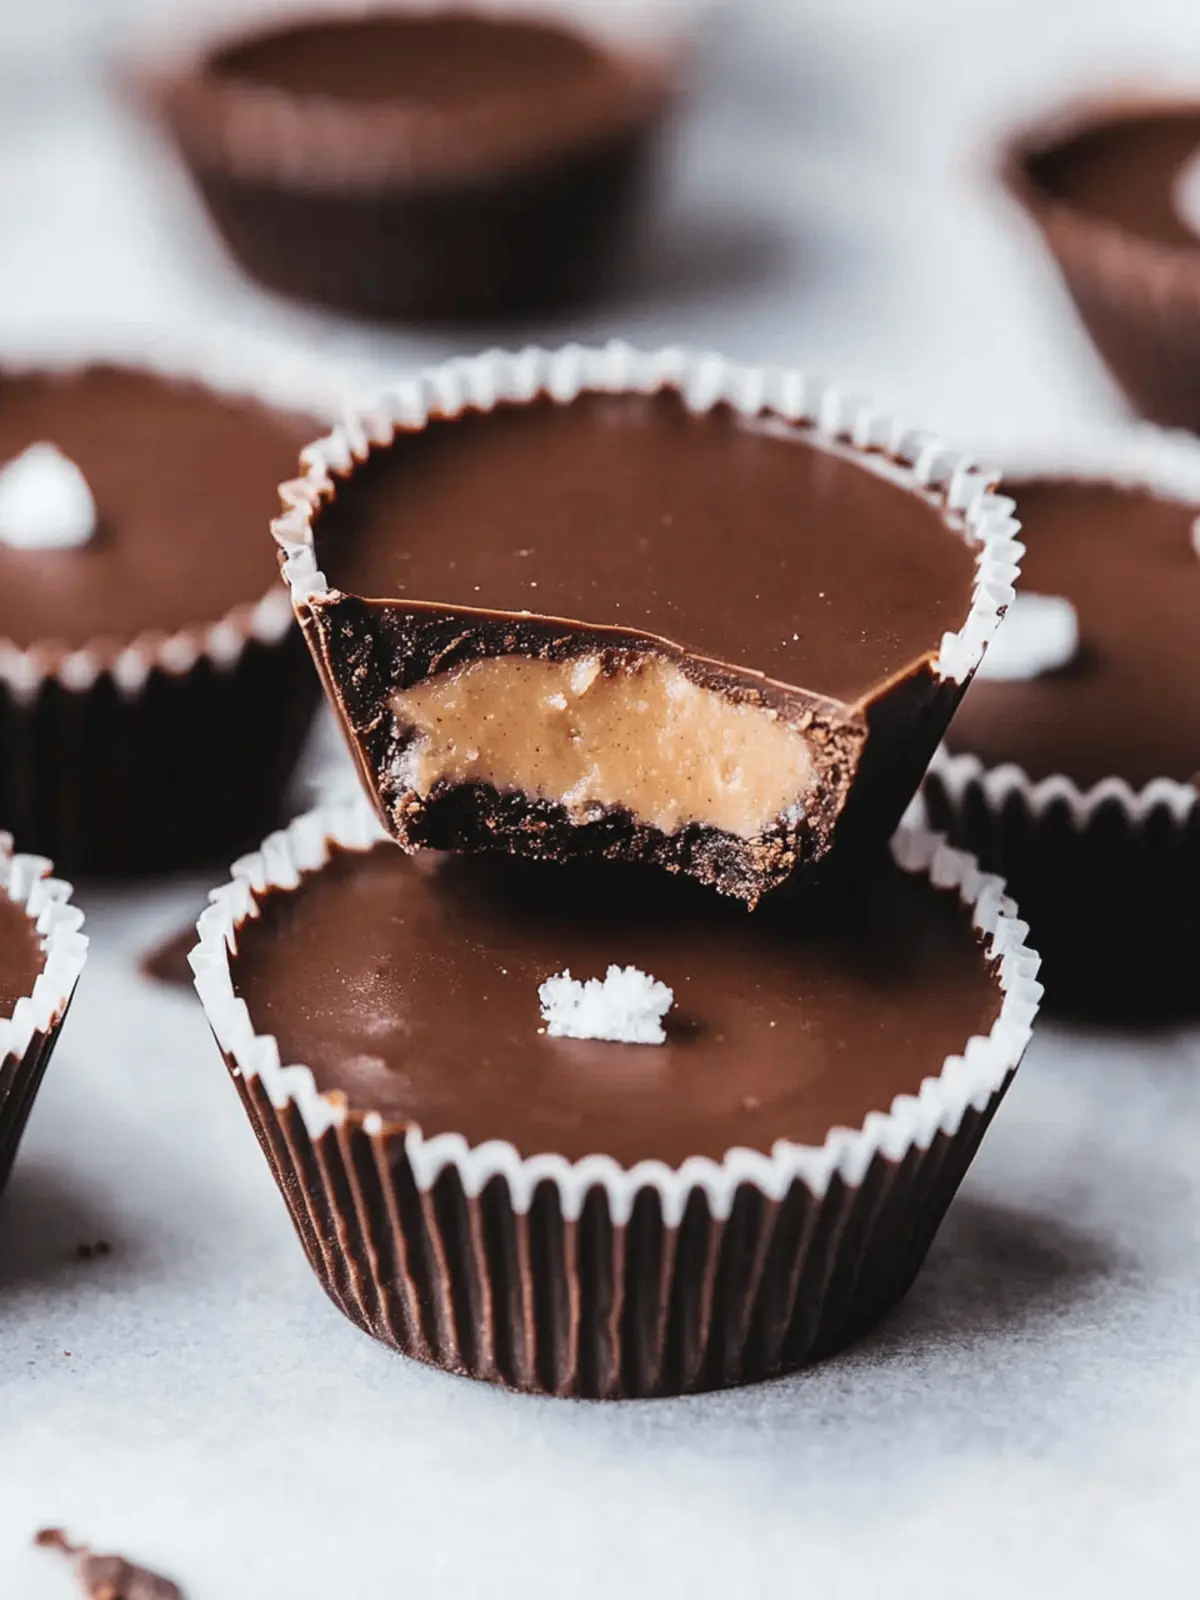
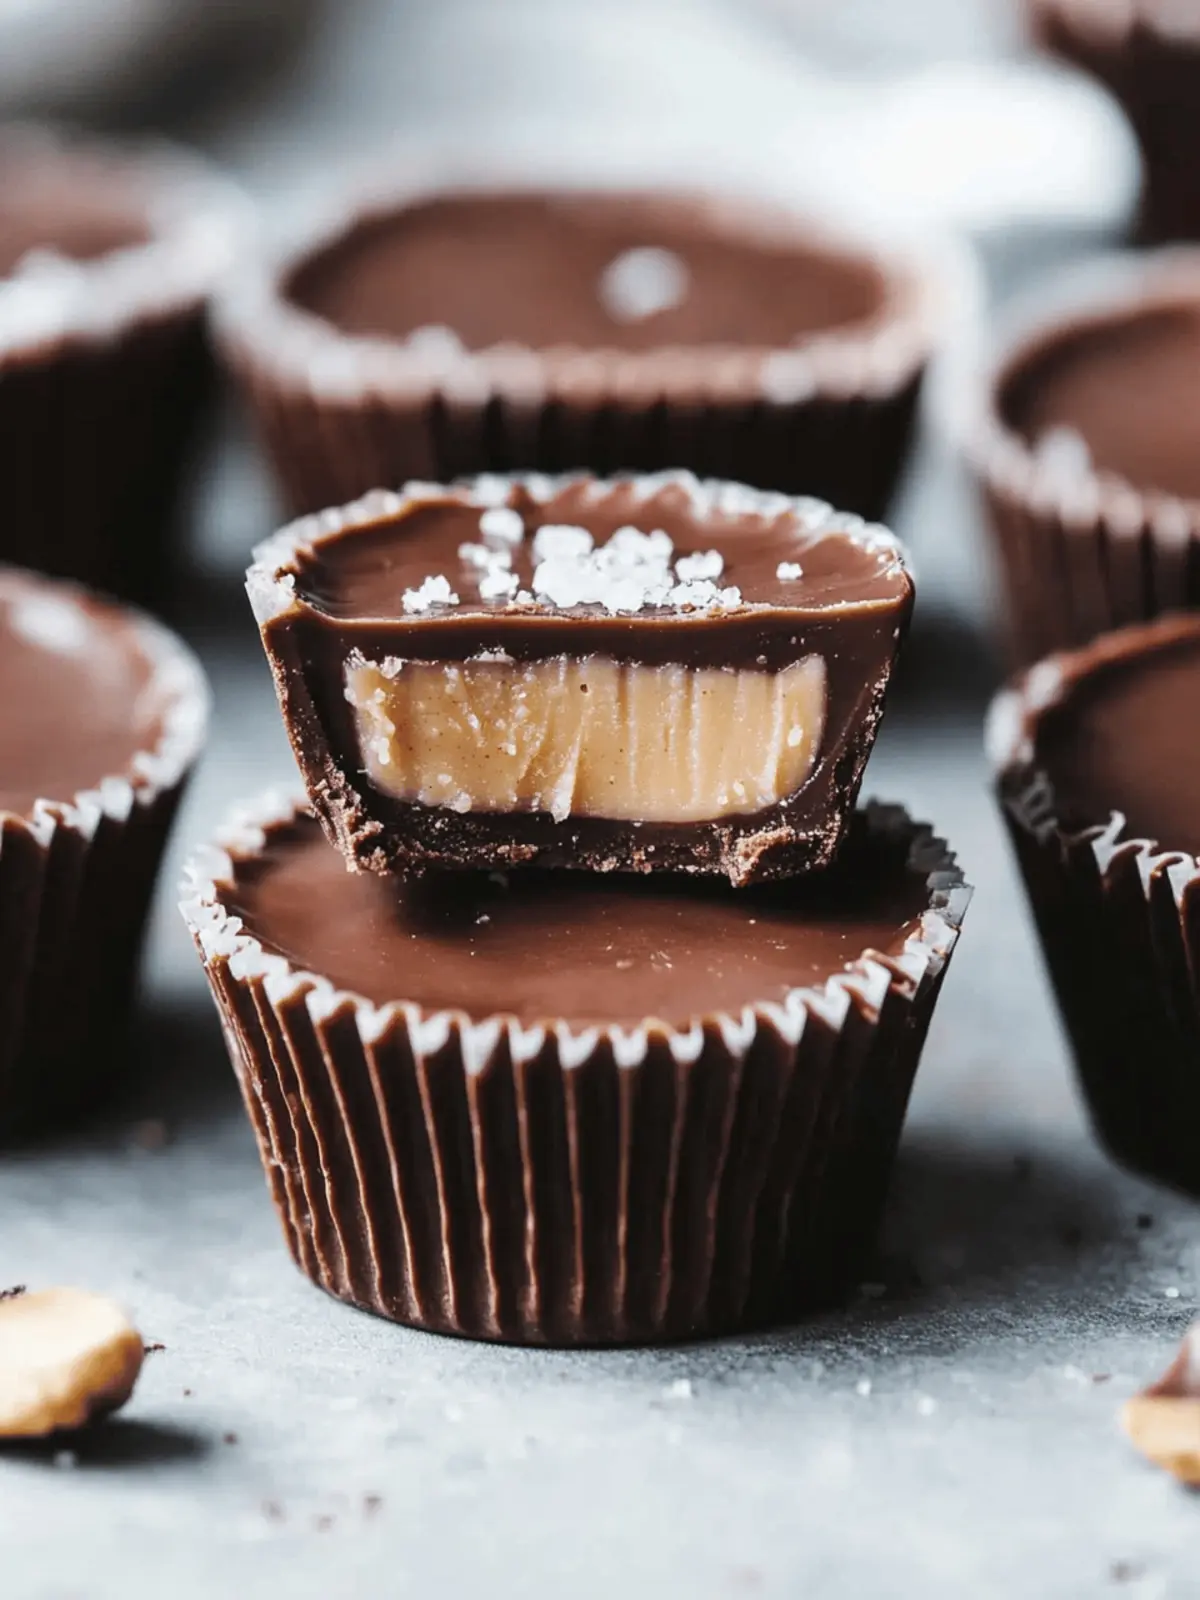
There’s nothing quite like the feeling of biting into a creamy, cold treat when the summer sun beats down or when your sweet tooth demands satisfaction. Recently, a simple kitchen experiment turned into a delightful discovery: Frozen Peanut Butter Nutella Cups. These no-bake beauties combine the nutty goodness of peanut butter with the indulgent, rich chocolate of Nutella, creating a perfect harmony of flavors that’s hard to resist.
Best of all, making these treats is as easy as it gets! You can whip them up in mere minutes, customize them to your liking with vegan options and alternative sweeteners, and have them ready to serve right from your freezer. Whether you’re looking to impress guests at your next gathering or simply indulge on a quiet evening at home, these Frozen Peanut Butter Nutella Cups will fit the bill. Get ready to elevate your dessert game with a recipe that’s as fun to make as it is to eat!
Why will you love Frozen Peanut Butter Nutella Cups?
Irresistible flavor: The creamy peanut butter blends beautifully with the rich, chocolatey Nutella, creating a delightful dessert experience.
No baking required: This simple recipe allows you to whip up these treats in minutes without turning on the oven.
Customizable delights: Switch out ingredients easily—try almond butter or even a vegan Nutella alternative for unique flavor profiles.
Chill and serve: Keep them in the freezer for any time your sweet tooth strikes; they make for a quick and satisfying snack.
Crowd-pleaser: Perfect for parties or gatherings, these cups will have everyone asking for seconds and sharing the recipe!
Elevate your dessert game with these easy-to-make delights that everyone will love!
Frozen Peanut Butter Nutella Cups Ingredients
• Here’s what you’ll need to create these delightful no-bake desserts!
For the Peanut Butter Layer
- Peanut Butter – Adds a creamy, nutty base; try almond butter for a change!
- Coconut Oil – Helps the layers firm up in the freezer; you can use butter but it may alter the texture.
- Powdered Sweetener – Sweetens the peanut butter layer; substitute with regular sugar if preferred.
For the Nutella Layer
- Nutella – Provides rich chocolate flavor; replace it with a vegan Nutella alternative for a dairy-free version.
- Melted Chocolate (optional) – Add an extra chocolaty layer on top; choose dairy-free chocolate for a vegan treat if desired.
Optional Add-ins
- Protein Powder (optional) – Boosts the nutritional value; ideal for those looking for a protein-packed dessert.
- Crushed Nuts or Chocolate Chips (optional) – Sprinkle on top for added crunch and flavor before freezing.
With these simple ingredients, you’re well on your way to enjoying the lusciousness of Frozen Peanut Butter Nutella Cups!
How to Make Frozen Peanut Butter Nutella Cups
-
Prepare the Peanut Butter Layer: In a mixing bowl, combine peanut butter, coconut oil, and powdered sweetener. Stir until smooth and creamy, ensuring there are no lumps.
-
Layer into Muffin Tin: Spoon the peanut butter mixture evenly into muffin liners or a silicone mold. Spread it nicely, then freeze for 15-20 minutes until firm.
-
Make the Nutella Layer: In a separate bowl, mix Nutella and melted coconut oil. Blend until the mixture is well combined and smooth, ready to spread beautifully.
-
Add the Nutella Layer: Take the peanut butter layer from the freezer. Carefully add a layer of Nutella mixture on top of each peanut butter cup. Return to the freezer for another 15-20 minutes.
-
Finish and Serve: Once both layers are firm, remove the cups from the liners or mold. Enjoy directly from the freezer, or let sit for 2 minutes for a creamier texture before indulging.
Optional: Drizzle some melted chocolate on top for an extra chocolatey treat!
Exact quantities are listed in the recipe card below.
Make Ahead Options
These Frozen Peanut Butter Nutella Cups are perfect for meal prep enthusiasts! You can prepare both layers up to 24 hours in advance. To do this, mix and freeze the peanut butter layer as instructed; once firm, cover it securely in the freezer. The Nutella layer can be made just before serving for the best texture, or it can be prepared and stored in the refrigerator for up to 3 days. When you’re ready to enjoy, simply remove the peanut butter cups from the freezer, add the Nutella on top, and freeze again for another 15-20 minutes. This way, you’ll have a delicious, quick treat waiting for you, just as delightful as freshly made!
What to Serve with Frozen Peanut Butter Nutella Cups?
Elevate your dessert spread with these delightful pairings that enhance every creamy, chocolatey bite.
-
Fresh Berries: The tartness of strawberries or raspberries adds a refreshing contrast, brightening the sweet richness of the cups.
-
Ice Cream: Serve with a scoop of vanilla or chocolate ice cream for a decadent treat that takes the indulgence up a notch.
-
Nut Milk: A chilled glass of almond or coconut milk complements the nutty flavors beautifully and provides a refreshing balance.
-
Whipped Cream: Light and airy whipped cream adds a fluffy texture, bringing a cloud-like touch that pairs superbly with the frozen cups.
-
Chocolate Sauce: A drizzle of warm chocolate sauce creates an extra layer of richness, making each bite even more heavenly.
-
Cold Brew Coffee: For the adults, a refreshing cold brew coffee adds an invigorating boost, harmonizing wonderfully with the dessert’s sweetness.
-
Granola Crumbles: Sprinkle some crunchy granola on top just before serving for an added crunch that enhances the overall texture experience.
-
Sliced Bananas: Mildly sweet and creamy, sliced bananas provide an additional fruity layer that complements the nutty flavors perfectly.
-
Chia Seed Pudding: A scoop of chia seed pudding brings a creamy, nutritious element that rounds out this heavenly dessert table effortlessly.
These pairings will not only enhance your experience with Frozen Peanut Butter Nutella Cups but also impress your guests at every gathering!
Expert Tips for Perfect Frozen Peanut Butter Nutella Cups
-
Layer It Right: Ensure each layer is spread evenly for balanced flavors; a thick peanut butter layer and a silky Nutella layer create the best bites.
-
Mix Well: If using natural peanut butter, mix thoroughly to avoid oil separation. This ensures a creamy texture in your cups.
-
Customize Wisely: Don’t be afraid to swap ingredients! Almond butter pairs wonderfully too, and a vegan Nutella alternative keeps it dairy-free.
-
Portion Control: Use a muffin tin for uniform cups, but a loaf pan can work too; just adjust your servings accordingly and double the amounts if needed.
-
Freezer Storage: Store in an airtight container in the freezer for up to 2 months—though, trust me, they’ll be gone sooner than you think!
Frozen Peanut Butter Nutella Cups Variations
Feel free to let your creativity flow as you make these delightful treats your own!
-
Nut Butter Swap: Exchange peanut butter for almond or cashew butter for a unique, nutty flavor twist. Both options offer a deliciously creamy base that complements the chocolate inspired layers.
-
Vegan Delight: Substitute Nutella with a dairy-free chocolate spread to craft a completely vegan version everyone will love! It’s all about maintaining that rich flavor while accommodating dietary preferences.
-
Crunch Factor: For added texture, sprinkle crushed nuts or mini chocolate chips on top of each cup before refreezing. This little extra step adds delightful crunchiness to each bite.
-
Sugar-Free Sub: Use a sugar-free powdered sweetener in place of traditional sugar for a lower-calorie treat that doesn’t skimp on flavor. Who said indulgence couldn’t be guilt-free?
-
Protein Boost: Introduce a scoop of your favorite protein powder into the peanut butter layer to elevate your dessert into a satisfying post-workout treat. It’s a tasty way to nourish your body!
-
Coconut Freeze: Add shredded coconut to the Nutella layer for an exotic twist. The tropical flavor pairs beautifully with the richness of chocolate and peanut butter, making each cup even more delightful!
-
Flavor Infusion: Incorporate a splash of vanilla extract into the peanut butter mixture for an added depth of flavor. A little vanilla can elevate these cups from great to unforgettable!
-
Spicy Twist: For those who like a kick, add a pinch of cayenne pepper or a dash of chili powder to the Nutella layer. You’ll enjoy a surprising heat that complements the sweetness in the best way!
Storage Tips for Frozen Peanut Butter Nutella Cups
Fridge: Store in the refrigerator if you plan to eat them within a day—this keeps them soft but may alter their texture.
Freezer: Keep the cups in an airtight container in the freezer for up to 2 months. They’ll be ready and waiting for when your sweet tooth strikes!
Reheating: Enjoy them straight from the freezer for a frozen treat or let them sit at room temperature for 2 minutes for a softer texture.
Wrapping: For optimal freshness, wrap each cup individually in plastic wrap before placing them in a container—it helps maintain their delightful flavors.
Frozen Peanut Butter Nutella Cups Recipe FAQs
How should I select ripe ingredients for my Frozen Peanut Butter Nutella Cups?
Absolutely! For the best flavor, use high-quality, natural peanut butter without added sugars or preservatives. Ensure the coconut oil is fresh—if it’s solid, it should melt easily. When choosing Nutella, look for the classic brand that’s smooth and rich. If opting for alternatives, check that the vegan Nutella has a similar texture for layering.
What’s the best way to store my Frozen Peanut Butter Nutella Cups?
Very good question! Store your cups in an airtight container in the freezer for up to 2 months. For optimal freshness, wrap each individual cup in plastic wrap before placing them in the container. This helps prevent freezer burn and keeps them tasting delightful.
Can I freeze the Frozen Peanut Butter Nutella Cups for later? How?
Definitely! To freeze, ensure the cups are well-frozen after the second layer, about 15-20 minutes. Once firm, remove them from the liners, and layer them in an airtight container with parchment paper in between to avoid sticking. They can be stored this way for up to 2 months. When you’re ready to enjoy, simply grab one from the freezer!
What if my nut butter is too oily? How can I fix that?
If you find your natural nut butter has separated and is too oily, no worries! Stir it thoroughly before using to ensure a creamy consistency. If it remains too oily, consider placing it in the fridge for a bit, as chilling can help it firm up. Additionally, blending with a bit of melted coconut oil can help create a smoother mixture.
Are there any dietary considerations for the Frozen Peanut Butter Nutella Cups?
Good to ask! If you’re concerned about allergies, these cups can be made nut-free by using sun butter or soy nut butter. For gluten or dairy-free options, simply choose a vegan Nutella alternative and avoid any added dairy ingredients. Always check labels if you have specific dietary restrictions.
How long can I keep these delights in the fridge?
Keeping your Frozen Peanut Butter Nutella Cups in the fridge is not recommended for extended time, but they can last about a day in the fridge for a softer texture if you prefer that. However, for the best quality and taste, they should be enjoyed straight from the freezer!
Irresistible Frozen Peanut Butter Nutella Cups You’ll Love
Ingredients
Equipment
Method
- Prepare the Peanut Butter Layer: In a mixing bowl, combine peanut butter, coconut oil, and powdered sweetener. Stir until smooth and creamy, ensuring there are no lumps.
- Layer into Muffin Tin: Spoon the peanut butter mixture evenly into muffin liners or a silicone mold. Spread it nicely, then freeze for 15-20 minutes until firm.
- Make the Nutella Layer: In a separate bowl, mix Nutella and melted chocolate. Blend until the mixture is well combined and smooth, ready to spread beautifully.
- Add the Nutella Layer: Take the peanut butter layer from the freezer. Carefully add a layer of Nutella mixture on top of each peanut butter cup. Return to the freezer for another 15-20 minutes.
- Finish and Serve: Once both layers are firm, remove the cups from the liners or mold. Enjoy directly from the freezer, or let sit for 2 minutes for a creamier texture before indulging.

